A strong restaurant POS setup does much more than turn on a screen and connect a card reader. It shapes how quickly orders move from the front counter or dining room to the kitchen, how accurately staff enter modifiers, how easily guests pay, and how clearly owners can track sales, tips, taxes, and labor.
When setup is rushed or poorly planned, even a good system can create delays, voids, order mistakes, kitchen confusion, and frustrated employees.
For small restaurants, the setup stage matters because every station, workflow, and device has to earn its place. Counter space is limited. Teams are lean. Busy periods can come fast.
A practical setup helps staff spend less time tapping through cluttered screens and more time serving guests, checking accuracy, and keeping service moving. It also helps prevent problems that often show up later, such as printer bottlenecks, confusing menu layouts, inconsistent payment handling, and weak user permissions.
This guide explains how restaurant point of sale setup works in real operations. It covers the hardware, software, payment flow, menu structure, staff access, and testing steps that matter most for small businesses.
Whether you are opening a café, replacing an outdated register, planning a restaurant POS installation for a full-service dining room, or building a smoother takeout workflow, the goal is the same: create a setup that matches how your restaurant actually works, not how a default template says it should.
What a restaurant POS system does and why setup matters
A restaurant POS system is the operational hub that connects ordering, payments, kitchen communication, reporting, and day-to-day control in one place.
It is where staff ring in menu items, apply modifiers, send tickets to the correct production area, collect payment, issue receipts, and close checks. It is also where managers review sales, adjust menus, track staff activity, manage discounts, and reconcile the day’s transactions.
In practical terms, the system sits at the center of service. A server may enter an order tableside or at a terminal. The order then routes to a kitchen printer or display. A cashier accepts a card, contactless payment, or cash.
The check closes. The sale appears in reports. Inventory and labor decisions later depend on the quality of that data. That is why restaurant order management system setup is so important. If the setup is messy, the data is messy too.
Good setup supports consistency. It helps the team follow the same process on a lunch rush, a slow afternoon, and a packed weekend night.
That includes consistent button placement, clean menu categories, sensible modifier rules, accurate tax settings, clear receipt output, and smart routing to each prep station. It also helps new employees learn faster because the flow makes sense.
Poor setup usually shows up in predictable ways. Staff may struggle to find popular items. Kitchen tickets may print in the wrong place. Payment prompts may confuse guests. Servers may have more access than they need.
Managers may discover too late that reports do not separate dine-in, takeout, and delivery in a useful way. By then, fixing the system takes more time because bad habits have already formed.
The difference between a cash register and a restaurant POS
A basic register records sales. A restaurant POS is built to support service flow. That difference matters because restaurants deal with more moving parts than many other small businesses. A burger combo is not just one item.
It may include a temperature choice, side selection, add-ons, allergy notes, and a drink. A table may need split checks, coursing, seat assignments, and a tip prompt. A takeout order may need pickup timing, packaging notes, and an order-ready notification.
A register can collect money, but it does not usually organize the full service process. A restaurant POS can connect front-of-house actions with back-of-house execution.
It helps operators manage menus, route tickets to the correct prep area, review voids and comps, run station-specific printers, and track different revenue centers. That makes setup more involved, but also more valuable.
For small operators, the biggest advantage is control. Instead of piecing together separate tools, a well-planned restaurant payment system installation creates a single workflow that staff can follow without constantly improvising. That saves time, reduces mistakes, and makes it easier to train new hires.
Why small businesses need a tailored setup instead of a generic one
No two restaurants operate the same way. A coffee shop with one register and a pickup shelf has very different needs than a full-service restaurant with servers, bartenders, expo staff, and multiple printers.
Even two similar cafés can need different layouts depending on whether they do more dine-in, mobile pickup, or bakery retail sales.
That is why POS systems for restaurant setup should start with the operation itself. Small businesses often have limited space, fewer managers, tighter staffing, and less room for error.
A generic setup can create extra screen taps, station crowding, poor printer placement, and confusing reports. Those issues are not minor. They slow down service and force staff to work around the system instead of with it.
A tailored setup looks at ordering volume, menu complexity, payment style, kitchen flow, and staff roles. It decides which stations need printers, which need customer-facing card readers, whether handheld devices are useful, and how menus should be organized.
It also considers practical details like cable placement, internet reliability, and what happens if one station goes down during a rush.
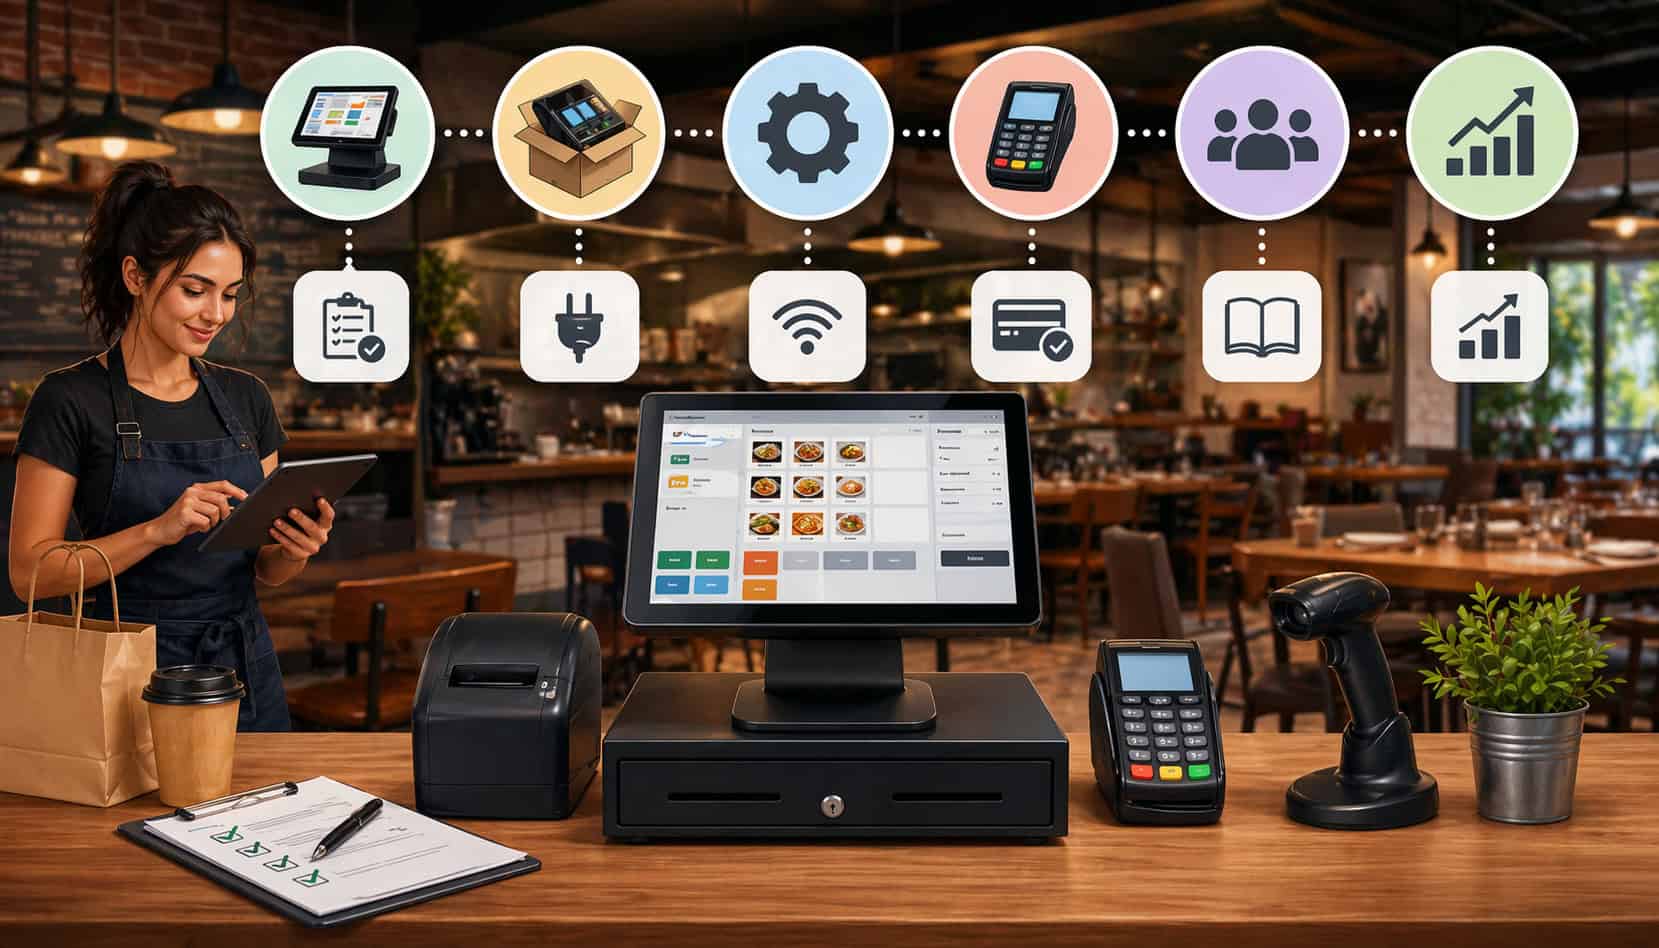
Core components involved in restaurant point of sale setup
A successful restaurant point of sale setup includes more than a touchscreen on the counter. It is a collection of hardware and network pieces working together so that orders, payments, and communication move smoothly across the operation. Each piece should have a clear purpose, and each station should be built around the work happening there.
The main hardware often starts with the POS terminal or touchscreen. This is where staff enter orders, manage checks, and access functions like discounts, refunds, clock-ins, and reports. In some operations, one fixed terminal is enough.
In others, multiple terminals are necessary so the counter, bar, host stand, or service station can each handle their own tasks without creating bottlenecks.
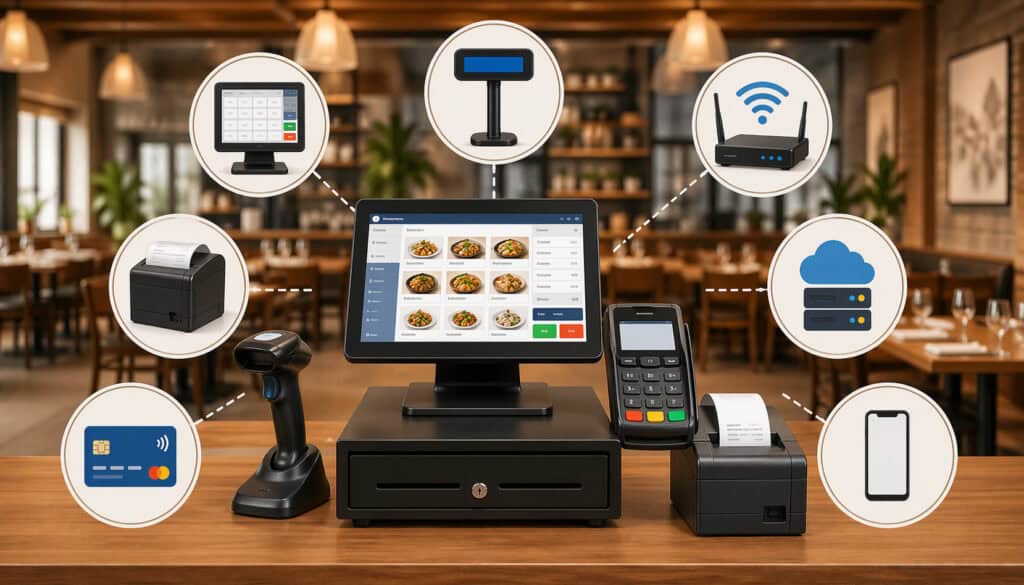
Printers are another major part of restaurant POS installation. Receipt printers typically live at payment stations, while kitchen printers may be routed by prep area such as grill, salad, dessert, or bar. Some restaurants use kitchen display systems instead of, or alongside, printers. Cash drawers connect to the station handling cash payments.
Card readers support dip, tap, and mobile wallet transactions. Handheld devices can help table-service teams speed up ordering and payment. Barcode scanners may be useful in cafés, bakeries, or hybrid retail concepts selling packaged items.
Then there is the network layer. Routers, internet service, Wi-Fi coverage, backup connectivity, and cable management are easy to overlook, but they are essential.
A restaurant can have excellent software and still struggle if terminals lose connection, kitchen devices lag, or guest Wi-Fi interferes with critical traffic. Small operators benefit from keeping the payment and POS network organized, secured, and easy to support if something goes wrong.
Payment systems should also be configured with security in mind, and operators handling card transactions should follow payment data protection practices and cybersecurity basics for small businesses.
POS terminals, card readers, and customer-facing checkout devices
The terminal is the command center of the station, but the setup around it determines how well it works in service. A counter-service restaurant may need a terminal angled for quick cashier entry with a customer-facing card reader nearby so guests can tap, insert, sign, or tip without slowing the line. A full-service restaurant may need a server station terminal plus handheld units for tableside ordering and payment.
Choosing terminal placement affects more than convenience. Staff should be able to reach the screen without twisting around. Guests should be able to access the payment device without leaning over other equipment.
Cables should stay protected from foot traffic, spills, and drawer movement. Screen glare should be minimized so staff can read tickets during bright daytime service.
Customer-facing devices deserve special attention. The tipping flow, signature prompts, digital receipt options, and contactless acceptance all shape the checkout experience.
If the prompt sequence is awkward, guests hesitate and lines stall. If the device is too far away or mounted poorly, staff may end up handling guest cards more than necessary. That adds friction and slows closeout.
For small operations, one well-planned station often performs better than two cramped ones. But once lines begin forming because one terminal handles orders, gift cards, phone-in checks, refunds, and closeout all at once, adding another properly placed station can pay off in reduced waiting and cleaner workflow.
Printers, kitchen display systems, and back-of-house communication
Kitchen communication is one of the most important parts of restaurant POS setup because this is where order accuracy either holds together or breaks apart. The best front counter experience means little if tickets pile up at the wrong station, modifiers print inconsistently, or expo cannot easily tell which orders are complete.
Kitchen printers are common in many small restaurants because they are familiar and easy to route. But placement matters. A printer should be loud enough to notice during busy service without becoming constant noise.
It should be protected from heat, grease, and spills. The ticket format should be readable at a glance, especially during rushes when staff do not have time to sort through long, cluttered lines of text.
Kitchen display systems can improve visibility by organizing orders on screens, separating active tickets from completed ones, and sometimes color-coding urgency. They can be especially useful in multi-station or high-volume operations.
Still, they require reliable mounting, power, visibility, and staff buy-in. If the kitchen team prefers paper tickets for some prep areas, a hybrid setup may work better than forcing one method everywhere.
Routing logic is just as important as the device itself. Drinks should go to the bar, pizza to the pizza station, desserts to dessert, and allergy notes should stand out clearly wherever they matter.
During setup, operators should test every major order type, including modifiers, combos, and special instructions, to confirm the correct output reaches the correct prep point every time.
Cash drawers, handhelds, scanners, and supporting equipment
Cash drawers may seem simple, but they still need planning. The location should allow quick cash handling without blocking traffic or exposing excess cash to guests.
If more than one employee uses the same drawer, accountability gets harder. In some settings, assigning drawers by shift or keeping tighter user tracking helps reduce discrepancies and make closeout cleaner.
Handheld devices are especially helpful when the service model benefits from mobility. In full-service dining, they allow servers to enter items at the table, reducing memory errors and extra trips to a fixed terminal.
In line-busting situations, they let staff begin orders before guests reach the register. In outdoor seating areas, they can speed up payment without bringing cards back and forth.
Barcode scanners are less central in many restaurants but can be useful in cafés, bakeries, or markets that sell packaged beverages, merchandise, bottled sauces, retail snacks, or grab-and-go items with SKU-based pricing.
If scanners are used, make sure the item database is clean and that scanned products are separated logically from made-to-order menu items.
Supporting equipment includes mounts, stands, label printers, receipt paper storage, surge protection, and cable management. These small details matter. A clean station is easier to use, easier to clean, and less likely to fail during a rush.
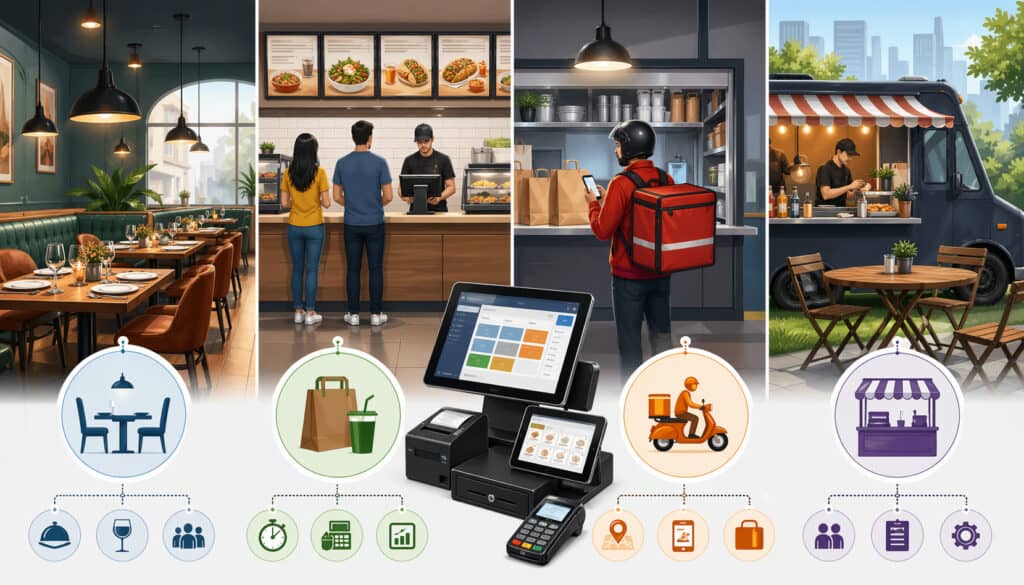
How setup needs vary by restaurant type and service model
A restaurant POS setup should match the service style, ticket flow, and pace of the restaurant. Small businesses often run into trouble when they copy another concept’s configuration without asking whether it actually fits their own operation.
The right setup for a fast-moving lunch counter may be wrong for a dining room with coursed meals, and a café’s simple modifier screen may break down in a pizzeria with half-and-half toppings and size-based pricing.
The service model changes what matters most. Quick-service operators usually care about line speed, fast payment acceptance, and easy combo building. Full-service teams care more about table mapping, seat positions, coursing, split checks, tips, and smoother server handoffs.
A food truck may prioritize compact hardware, stable mobile connectivity, and battery or power planning. A takeout-focused operation may care most about order timing, pickup labeling, and keeping phone, in-person, and online order flows from colliding.
This is why a small restaurant POS guide should never stop at hardware lists. The same terminal, printer, and reader can be arranged very differently based on the concept. Setup should reflect who takes the order, where the order is produced, how guests pay, how tips are handled, and where delays are most likely to happen.
A smart setup also leaves room for the business to evolve. A café might add online ordering. A pizza shop might expand delivery zones. A counter-service restaurant might later add self-order kiosks or handheld payment at the table. Setting up with flexibility in mind makes those future changes easier.
Quick-service, counter-service, and café setup priorities
Quick-service and counter-service restaurants often live or die by order speed and checkout flow. Guests expect a clear line, a fast ordering process, and minimal friction at payment. For these operations, the most important setup decisions often involve terminal placement, menu button design, combo logic, and kitchen routing.
The front station should support fast entry of top-selling items with minimal screen changes. Popular categories should be immediately visible. Add-ons and common modifiers should take one or two taps, not five.
The card reader should be easy for guests to reach without awkward handoffs. If there is a pickup area, completed order communication should be separated from the active order-taking space so staff do not compete for the same counter.
Cafés have their own needs. Beverage modifiers, milk choices, sizes, temperature, pastry add-ons, loyalty, and quick barcode scanning for packaged goods may all be part of the flow. Morning rushes often require an especially efficient counter layout. One station may handle ordering while another focuses on drink handoff, depending on volume.
In these environments, kitchen or bar routing must stay simple and readable. If tickets are too detailed or poorly grouped, production slows. Clear naming, sensible categories, and consistent modifier display make a major difference during peak hours.
Full-service dining room and bar setup priorities
Full-service restaurants need a different type of POS systems for restaurant setup because table management becomes central. The system has to support table assignment, check management, coursing, seat positions, bar communication, and flexible payment handling.
One of the biggest setup mistakes in full-service environments is treating the dining room like a counter-service operation with extra buttons added later.
Servers need quick access to their tables, open checks, menu categories, and common service functions. If the table map is confusing or the screen sequence is too deep, staff lose time and order accuracy suffers. The kitchen also needs better detail. Courses, hold instructions, allergy notes, and seat numbers need to be visible where they matter.
Bars introduce their own routing needs. Drink tickets should not disappear into food printer traffic. Bartenders need a readable queue, and service bar communication must be fast enough to support the floor. If handheld devices are used, tableside payment can reduce card-running trips and help turn tables more smoothly.
Split checks, partial payments, void controls, and tip prompts need extra testing in this environment. The payment process is often more varied than in quick service, so setup should account for shared checks, partial cash payments, manager approvals, and receipt options.
Food trucks, pizzerias, and takeout-heavy operations
Food trucks and takeout-focused concepts need POS setups built around compact space, mobility, and timing. In a food truck, the physical footprint matters as much as software.
The terminal must be secure in a tight area, the power setup must be dependable, and the internet connection must remain usable even when the truck changes location or service conditions change.
Pizzerias often need more complex menu logic than many other concepts. Size-based pricing, crust selections, specialty builds, half-and-half toppings, bake notes, and timed preparation can create a surprising amount of setup detail.
A generic menu screen usually becomes frustrating quickly unless it is carefully structured for how orders are actually spoken, entered, and produced.
Takeout-heavy restaurants need clean order source separation. Staff should be able to distinguish walk-in, phone, pickup, delivery, and third-party orders clearly.
Pickup timing, label printing, order-ready status, and packaging notes all matter more here than in some dine-in environments. If the front counter is handling both live guests and incoming takeout volume, the layout should reduce collisions between those two flows.
These concepts benefit from highly intentional station design. Every tap, printer, label, and device position needs to support speed without creating confusion.
Step-by-step guide to set up a restaurant POS system
To set up a restaurant POS well, start with workflow planning before touching hardware. Too many businesses jump straight into screens, cables, and menus without deciding how service should function.
The best setup process begins with an operational map: where guests order, where staff enter orders, how tickets reach production, how payment is accepted, how receipts are delivered, and how managers review the day. Once that map is clear, configuration becomes much easier.
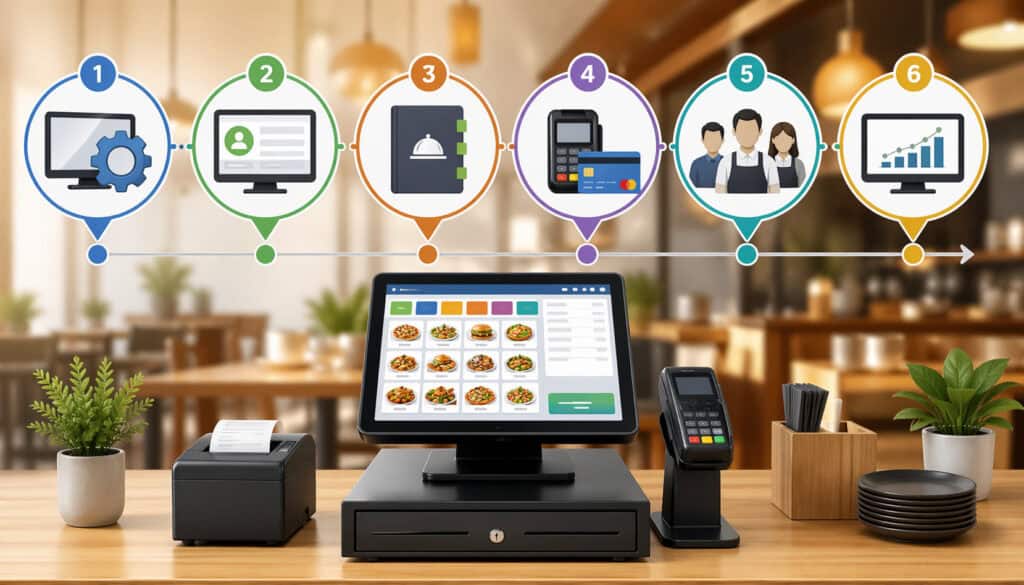
The full process usually includes layout planning, hardware selection, network preparation, software configuration, menu building, payment connection, permission setup, printer or display routing, testing, and training.
Each step matters because mistakes in early setup often spread into later problems. A poorly structured menu causes ticket issues. Weak permissions create refund risk. Bad printer placement leads to kitchen confusion. Incomplete testing allows avoidable problems to appear during live service.
A practical restaurant tech setup checklist should focus on real workflows, not just completed boxes. It is not enough to say the printer is installed. You need to know whether salads route correctly, split checks close properly, modifiers print clearly, contactless payments work, and managers can find the reports they actually need.
The goal is not a perfect system on day one. The goal is a stable, usable setup that supports service, captures accurate data, and can be refined after real staff use it. Small businesses usually do best when they launch with a clean core structure and then make thoughtful adjustments from actual service observations.
Step 1: Map the floor, stations, and order flow
Begin by identifying every place where orders can start, change, or close. That may include the front counter, drive-through window, host stand, server station, bar, expo line, patio handhelds, or pickup shelf.
Then decide what each station actually needs to do. Some only take orders. Some only take payments. Some need both. Some need access to management functions, and some should not.
Next, look at physical flow. Where do guests line up? Where do staff cross paths? Where do tickets land? Where are power outlets and network drops? Where can a printer sit without getting splashed or overheated? Small layout choices have a big effect on speed and safety.
This is also the right time to think about routing. Which prep areas need separate output? Who needs to see dine-in versus takeout? How will staff identify rushed or priority orders? A layout that supports visual clarity usually performs better than one built around convenience alone.
For example, a small café may place the terminal near the pastry case but keep the card reader slightly forward so guests can pay while the cashier starts the next interaction. A full-service restaurant may use one main service terminal near the kitchen and a separate bar terminal so bartenders are not blocked by floor staff.
Step 2: Choose hardware based on service needs, not just price
When selecting POS hardware for restaurants, match each piece of equipment to its actual role. Buying the cheapest bundle without considering service flow often leads to replacements, workarounds, or clutter. Start with the stations you truly need, then build outward.
Use the table below as a practical planning tool:
| Setup Area | Typical Hardware | Best Fit For | Key Setup Consideration |
| Front counter | Terminal, card reader, receipt printer, cash drawer | Counter-service, café, takeout | Keep payment device guest-accessible and protect cable paths |
| Server station | Terminal, printer, cash drawer if needed | Full-service dining rooms | Place near service path, not inside guest congestion |
| Bar | Terminal, receipt printer, kitchen/bar printer | Full-service, bar service | Separate drink routing from kitchen traffic |
| Kitchen | Kitchen printer or display system | Most restaurant types | Mount or place where tickets are visible and protected |
| Tableside | Handheld device, mobile payment reader | Full-service, patio service | Test Wi-Fi strength and charging workflow |
| Pickup area | Label printer, order-ready screen or receipt station | Takeout-heavy operations | Keep completed orders separate from active line flow |
Think beyond the initial purchase. Ask how easy the hardware is to clean, how it handles spills and heat, how replacement parts are sourced, and whether staff can use it comfortably during a rush. A device that saves a little money upfront but slows service every day is rarely the better choice.
Step 3: Build the menu with categories, modifiers, and logic
Menu configuration is one of the most important parts of restaurant POS setup because it affects speed, ticket accuracy, kitchen readability, reporting, and staff training. Start by building broad categories that mirror how staff think during service.
That usually means drinks, appetizers, entrées, sides, desserts, retail items, and similar groupings based on the concept.
Then build the item structure carefully. Popular items should be easy to find. Sizes should be clear. Modifier groups should appear only when relevant. A coffee order should not require the same modifier path as a burger combo, and a kid’s meal should not open every possible add-on by default.
Use required modifiers where the kitchen truly needs a choice, such as temperature, side selection, dressing type, or crust option. Use optional modifiers where guests may add extras without slowing standard orders.
Keep names consistent. A modifier called “No Onion” should not appear elsewhere as “Without Onions.” Small naming inconsistencies confuse both staff and reports.
Combos, bundles, and meal deals need special care. They should build logically and route cleanly. If one combo produces messy kitchen output or poor reporting, it can become a daily headache. Test the most common orders first and build from there.
Step 4: Set permissions, manager controls, and accountability
User permissions shape security, accountability, and training quality. In many small restaurants, permission settings are either too loose or too restrictive. If everyone can void checks, change prices, process refunds, or access reports, the restaurant loses control. If nobody can handle routine tasks without finding a manager, service slows down.
A good setup assigns access by role. Cashiers may need to enter orders, apply approved discounts, and close checks. Servers may need table functions, transfers, split checks, and tips. Shift leads may need limited approval authority. Managers may need deeper reporting, menu editing, refund control, and end-of-day tools.
Tracking matters here too. Individual logins or secure sign-ins help create usable audit trails. That makes it easier to review voids, comps, no-sales, cash drawer activity, and edits. It also helps during training because managers can see where errors are happening.
Do not overlook time clock and shift controls if they are part of the system. These settings often affect reporting and labor management. Keep access practical, but controlled.
Step 5: Connect payment devices, taxes, receipts, and closeout flow
Restaurant payment system installation should support how guests actually pay. That includes card insertion, tap payments, mobile wallets, cash, split checks, printed receipts, digital receipts, and tipping.
Card acceptance and receipt handling should feel natural at the station, not bolted on afterward. Businesses that accept cards also need workflows that support authorized transactions, strong payment data handling, and consistent closeout practices.
Set tax rules carefully for each revenue type. Dine-in, takeout, alcohol, retail, and service charges may not always follow the same structure. Tips also need correct configuration so prompts, reporting, and payroll-related records make sense. Restaurants that collect tips should make sure their setup supports accurate tip tracking and reporting responsibilities.
Build the payment flow in the exact order guests experience it. Does the tip prompt appear before or after signature? Can the server split by seat and then accept mixed payments? Can the cashier reprint a receipt quickly? Can a manager issue a partial refund without disrupting the rest of the shift? These are practical questions, not technical ones, and they should be answered during setup.
Step 6: Test everything before live service
Testing is where a small restaurant POS guide becomes real. Do not rely on “it should work.” Run transactions from start to finish. Enter dine-in orders, counter orders, phone orders, online pickup equivalents if relevant, split checks, refunded items, voided items, cash payments, card payments, discounts, modifiers, and tax-exempt scenarios if they apply.
Verify where each ticket prints or appears. Confirm that kitchen wording is readable. Make sure receipts show the right details. Check that reports classify sales correctly. Review user permissions with real employees or managers acting in role. Test internet interruption procedures and confirm what still works if connectivity becomes unstable.
A soft launch or staff-only rehearsal helps reveal hidden problems. It is better to discover that the dessert printer is too quiet or the card reader mount is awkward during training than during a Saturday dinner rush.
How to configure menus, modifiers, discounts, taxes, and reporting for real operations
One of the most valuable parts of restaurant POS setup is creating a menu and reporting structure that reflects real operations instead of a generic software template.
The way items are built affects almost every part of service: how quickly staff enter orders, how clearly the kitchen reads tickets, how accurately managers understand sales trends, and how easily the restaurant handles discounts, combo pricing, or tax treatment.
Operators often underestimate this stage because menu entry sounds simple. In reality, restaurant order management system setup is where small decisions create either daily efficiency or daily friction.
The screen flow should match how staff speak and think about the menu. The kitchen output should match how the line prepares items. Reports should group sales in ways that support ordering, staffing, pricing, and menu changes.
This is also where you decide what the system will force staff to do and what it will allow them to skip. Required modifiers can prevent incomplete tickets. Smart category design can reduce missed items. Well-structured reporting can reveal whether a special is selling, whether an add-on is profitable, or whether a discount is being overused.
Good configuration takes time, but it pays back constantly. It helps the kitchen trust the POS, helps managers trust the reports, and helps staff move through the menu with less hesitation.
Setting up categories, item names, and modifier groups
Start with categories that reflect service reality, not accounting labels. Staff should be able to think, “I need coffee,” “I need pizza,” or “I need beer,” and get there immediately. Avoid burying high-volume items under unnecessary submenus unless the menu is genuinely large enough to require it.
Use item names that are short enough for screens and tickets but clear enough to avoid confusion. Kitchen staff should instantly know what the ticket means. If similar items exist, distinguish them early in the name rather than relying on tiny differences at the end.
Modifier groups should be purposeful. Group choices by decision type: size, temperature, side, sauce, toppings, add-ons, doneness, allergy removal, and so on. Make required selections required only when they truly matter. Too many forced prompts slow service. Too few create incomplete tickets.
For example, a café might set up a latte with required size and temperature modifiers, plus optional milk and syrup groups. A burger shop might require temperature and side, while keeping cheese and bacon as optional add-ons. A pizzeria may need separate topping logic by size and half selection. The goal is to reduce thinking during order entry without reducing clarity.
Configuring combos, discounts, tips, taxes, and service charges
Combos and bundles should be built to support both speed and reporting. If a combo includes an entrée, side, and drink, the system should let staff build that order quickly while still routing each component correctly. Reporting should show whether the combo is driving mix shifts, not just lumping everything into one number without detail.
Discounts need discipline. Build only the discounts the business truly uses, and label them clearly. Employee meal, happy hour, manager comp, loyalty reward, and void are not the same thing. If discounts are vague or permissions are weak, reporting becomes hard to trust. The same goes for service charges or fees. They should appear clearly on checks and in reports.
Tip setup should reflect actual service style. Counter tips, tableside tips, printed tip lines, and digital tip prompts each need thoughtful configuration.
Prompts should feel natural in the payment flow and not create confusion for guests or staff. Restaurants that rely on tip income should make sure the POS captures tip records clearly enough to support payroll and tax reporting processes.
Tax settings should be reviewed carefully at the item and order level. Different item types or service methods can create different tax treatment, so this is not an area to rush.
Building reports that help managers make decisions
Reports are only useful if setup makes them meaningful. A restaurant should be able to answer practical questions such as:
- What sold best by category?
- What were dine-in versus takeout sales?
- Which discounts were used and by whom?
- What were hourly sales patterns?
- Which modifiers were most common?
- Were tips and refunds recorded correctly?
- How did each station or server perform?
To make those answers possible, revenue centers, item groups, payment types, and user roles need to be configured consistently. If a takeout order is sometimes entered as dine-in and sometimes as quick sale, reporting loses value. If retail items sit inside beverage categories, cost review becomes harder later.
For a small café, reporting may focus on ticket count, average ticket, morning rush mix, and labor timing. For a full-service restaurant, table turns, server sales, voids, and alcohol mix may matter more. Reporting should support the decisions the operator actually makes each week.
Payment setup, checkout flow, and reconciliation
Payment is where operational setup becomes customer experience. A strong restaurant payment system installation should make checkout accurate, fast, secure, and easy for both staff and guests.
If ordering goes well but payment feels slow or awkward, the final impression suffers. If payment handling is inconsistent, reporting, cash control, and closeout can become messy even when sales were strong.
Restaurant payment setup includes more than connecting a terminal. It includes deciding how the guest will interact with the device, where the device will be placed, what types of payments will be accepted, how tips will be prompted, what the receipt options will look like, and how split checks or refunds will be handled.
For small operators, these details matter because checkout often happens in tight spaces, under time pressure, and across multiple service types.
A good payment flow also protects the business. That means clear approval paths for refunds, consistent end-of-day reconciliation, dependable handling of tips, and enough visibility into payment types that managers can spot problems quickly.
Payment acceptance should be smooth, but internal control should remain strong. Card data protection and small-business cybersecurity practices are also part of responsible setup, especially when payment devices and connected networks share physical space with other restaurant technology.
This is one area where testing real scenarios matters a lot. A simple sale is easy. A half-cash, half-card split check with a refund adjustment and printed receipt is where weak setup shows itself.
Card acceptance, contactless payments, and guest-facing flow
Most guests expect card and contactless payment to work without friction. That means the card reader should be clearly visible, close enough to reach comfortably, and placed so guests can complete the transaction without having to ask what to do next. The best layouts reduce handoffs and keep the process intuitive.
Think through the sequence. Does the screen show the total before the guest taps? Does the tip prompt appear in a natural place? Are signature requests still necessary in your specific flow? Can a printed or digital receipt be offered quickly without making the guest wait? These choices influence line speed and staff confidence.
Counter-service setups often benefit from a forward-facing reader that creates a clear “your turn to pay” handoff. Full-service environments may prefer handheld tableside devices or a server-carried terminal flow that avoids repeatedly taking cards away from the table. In either case, payment should feel deliberate, not improvised.
If the restaurant accepts gift cards, house accounts, loyalty redemptions, or online prepayments, those payment paths should also be tested. Staff should know how each one looks on the screen and how it appears in reporting later.
Refunds, split checks, tips, and end-of-day closeout
Restaurants deal with a wider range of payment situations than many small businesses. One table may split evenly. Another may split by item. A takeout guest may want a partial refund for a missing side. A bar tab may need to be adjusted. If the POS is not configured for those realities, staff either struggle through workarounds or rely on manager intervention too often.
Split check functions should be tested by seat, by amount, and by selected items if those options are relevant. Refund controls should require appropriate approval while still allowing managers to handle guest issues quickly. Tip flow should align with the service model and generate clean reports for shift closeout.
End-of-day reconciliation should be simple enough to follow consistently. Managers should be able to compare expected versus actual cash, review card totals, identify open checks, verify tip amounts, and close the day without hunting through multiple screens.
If the system is part of payroll or tip reporting workflows, accuracy here matters beyond the shift itself. Restaurants with tipped employees should also keep reporting requirements in mind when reviewing daily tip records and payroll-related controls.
A clean closeout process reduces surprises. It also builds confidence that the system is capturing what actually happened on the floor.
Common restaurant POS setup mistakes and how to avoid them
Many restaurant owners do not struggle because they chose the wrong system. They struggle because the restaurant POS setup was never aligned with the way the business actually runs. Setup mistakes can look small at first, but they tend to repeat hundreds of times a week.
A bad button layout creates extra taps on every ticket. Weak permissions create risk on every shift. Poor printer routing causes confusion on every rush.
The good news is that most setup mistakes are predictable. Small businesses can avoid them by slowing down during configuration, involving the right staff in testing, and checking real workflows instead of assuming defaults will be good enough.
Restaurant POS installation should not be treated like a one-time technical task. It is part operational design, part training strategy, and part risk control.
Another common issue is trying to build everything at once. Operators sometimes overload the initial setup with edge cases, rare menu paths, and too many manager-only features. That can make screens crowded and training harder. It is often better to launch with a clean, thoughtfully organized structure that covers real daily use, then refine based on actual service patterns.
A balanced setup keeps the system usable for the team, readable for the kitchen, and reliable for managers. That balance is what prevents routine friction from turning into expensive operational drag.
Cluttered screens, poor menu logic, and bad station placement
One of the most common problems is trying to fit too much on the screen. When every item, discount, modifier, and manager function is visible at once, staff lose speed and confidence. Important buttons get buried. New hires hesitate. Order entry slows down.
Poor menu logic creates similar issues. Items may be categorized by internal preference instead of service logic. Modifier groups may appear in the wrong order. The kitchen may receive tickets that are technically correct but hard to read. A complicated screen does not always mean a powerful system. Often it just means nobody simplified the setup.
Station placement can also undermine a good configuration. A terminal placed where two staff members constantly cross paths will create congestion no matter how clean the software is. A receipt printer placed behind a prep area may be technically functional but operationally annoying. Hardware should support movement, not interrupt it.
These problems are best solved by observation. Watch where staff pause, reach awkwardly, re-enter orders, or leave notes for the kitchen. Those moments usually point directly to setup fixes.
Weak permissions, poor backup planning, and limited testing
Another frequent mistake is leaving permissions too open because it feels easier during setup. But that convenience often creates bigger problems later. If too many people can edit prices, run refunds, or remove items without oversight, accountability disappears.
At the same time, if routine approvals require a manager for every small exception, service slows down. Good permission design supports control without constant interruption.
Backup planning is another weak spot. Restaurants sometimes assume the internet and devices will always work as expected. But service disruptions happen.
A practical restaurant tech setup checklist includes backup connectivity options, spare receipt paper, charging routines for handhelds, procedures for temporary outages, and a simple fallback method for taking orders if needed.
Limited testing is the mistake that lets all other mistakes survive into launch. Many setups are tested with one simple sale and then declared ready.
Real testing should include unusual but common scenarios: no onions, split checks, void after send, cash plus card, reprint receipt, manager comp, refund, gift card, large order, and printer failure. The more realistic the testing, the fewer surprises during service.
Training staff, soft-launch testing, and post-setup improvements
Even a well-designed restaurant POS setup can fail if employees are not trained in the actual flow they will use on live shifts. Training should not focus only on where buttons are.
It should teach staff how the system supports service: how to enter an order accurately, how to handle a modifier, how to fix a mistake, how to split a check, how to send a rush ticket correctly, how to close out a payment, and when manager approval is needed.
For small businesses, this matters because there are usually fewer layers of supervision. Staff need enough confidence to use the system without freezing during a rush, but they also need enough structure to stay consistent.
A system that is “easy to learn” still needs organized training. The best approach combines role-based practice, test transactions, and floor-based rehearsal.
A soft launch is especially useful. That might mean a staff meal simulation, a friends-and-family service, or a limited-service period where the team can work through live orders with extra attention.
Soft launches reveal the small issues that setup teams often miss: wrong printer volume, awkward payment prompts, confusing modifier labels, or receipts missing useful details.
The final step is accepting that setup is not finished on opening day. Real service teaches you what the system should become. Good operators review patterns, gather feedback, and adjust carefully rather than rebuilding everything after the first complaint.
What staff training should include by role
Cashiers, servers, bartenders, kitchen leads, and managers do not need the same training. Role-based training is usually more effective because it keeps employees focused on the functions they will actually use.
A cashier may need order entry, modifiers, payments, receipt handling, and refund escalation. A server needs table management, courses, split checks, and tips. A manager needs overrides, reporting, cash review, and troubleshooting basics.
Training should include mistakes on purpose. Show staff how to fix the wrong drink size, how to re-fire a ticket correctly, how to transfer a check, and what to do if a printer stops responding. Employees gain confidence when they know how to recover, not just how to start.
Kitchen staff should also be included. They need to understand how tickets will appear, how modifiers are displayed, and what certain abbreviations or routing labels mean. Front-of-house and back-of-house training should connect, not happen in isolation.
Short reference sheets can help, especially in the first two weeks. Keep them focused on real tasks instead of long system manuals.
How to use testing and feedback to improve after launch
After launch, review actual usage patterns. Look for recurring voids, confusing modifiers, repeated manager overrides, delayed tickets, or staff complaints that point to specific friction. Good post-launch improvement is not random tweaking. It is targeted cleanup based on service reality.
Set a short review rhythm. For example, managers might review issues after the first weekend, after the first full pay period, and after the first month of use. That helps catch patterns before they harden into routine workarounds. Changes should be documented and communicated clearly so staff are not surprised by screen changes midweek.
Keep an eye on reporting too. Sales mix, discounts, refunds, and labor entries often reveal setup quality. If reports are not helping decision-making, the configuration may need better category structure or more accurate revenue center setup.
The system should evolve with the restaurant, but not change constantly. Stable core workflows with thoughtful updates usually perform better than frequent large adjustments.
Real-world setup examples for four small restaurant types
A practical small restaurant POS guide should show how setup changes from one concept to another. The same software can support very different operations, but only if the configuration fits the business model.
Looking at realistic examples helps owners and managers understand how planning decisions translate into station design, menu flow, kitchen communication, and payment handling.
These examples are not meant to be rigid templates. They are working models that show what matters most in different environments. A small café needs quick modifier entry and smooth morning checkout.
A full-service dining room needs table logic and split-check flexibility. A counter-service restaurant needs line speed and simple combo building. A takeout-heavy operation needs source separation and pickup clarity.
What matters in each case is not complexity for its own sake. It is the alignment between the system and the operation. That alignment is what makes set up a restaurant POS decisions feel useful instead of overwhelming.
Example 1: Small café with morning rush and retail add-ons
A neighborhood café often has two competing needs: fast beverage ordering and a small set of retail or bakery items moving through the same counter. In this setup, one main terminal handles most transactions.
A guest-facing card reader sits at the edge of the counter for quick tap payments. A receipt printer is nearby, but digital receipts are enabled for speed when preferred. A barcode scanner helps with bottled drinks and retail snacks.
The menu is built around top-volume categories first: brewed coffee, espresso drinks, tea, pastries, and retail. Size and temperature are required modifiers for drinks. Milk choices and flavor add-ons appear only when relevant.
Pastries are single-tap items with simple warming or packaging notes. The barista station receives clear drink tickets, while food items route to a small kitchen printer.
This setup reduces morning bottlenecks because the cashier can move quickly through the order, the guest can pay without confusion, and the barista receives readable output. Reports separate beverage sales from retail items so the owner can review mix and reorder needs.
Example 2: Full-service dining room with bar and split checks
A full-service restaurant usually needs one or more server stations plus a dedicated bar terminal. In this example, the dining room uses a table map with sections assigned by the server.
Each table opens to seat positions, making split checks and seat-level ordering easier. Servers can ring items by course, and the kitchen tickets display course timing where needed.
The bar terminal receives drink tickets separately from the kitchen to avoid crowding one printer queue. Servers can print guest checks, take payment, and reopen when needed with manager-controlled permissions.
Handheld devices may be used for tableside ordering or payment in patio areas, but the main station still serves as the anchor for more complex transactions.
Split checks are configured by seat and by selected item, since both are common in real service. Tip prompts, payment adjustments, and printed receipts are tested thoroughly. Managers review voids, discounts, and comps by user.
This kind of restaurant POS setup supports service pace because it respects the complexity of dine-in flow instead of forcing everything through a quick-sale model.
Example 3: Counter-service restaurant with combos and rush periods
A fast casual counter-service restaurant needs a setup that supports high order volume and fast payment. In this model, two front terminals help prevent line backups. One handles order entry and payment.
The other can assist during rushes or process pickup and refund tasks when needed. Each terminal has a card reader, but only one has a cash drawer to simplify cash accountability.
The menu is built for speed. Entrées, combos, sides, drinks, and add-ons are immediately visible. The combo builder walks staff through the required selections in a clear order: entrée, side, drink, then optional add-ons. Kitchen routing separates grill, fry, and expo where relevant. Receipt formatting includes order numbers large enough for pickup identification.
This setup helps because the system supports the way guests order in the line. Staff can stay fast without memorizing complicated button paths, and the kitchen receives cleaner tickets. The owner also gets usable reporting on combo usage, average ticket, and rush-hour sales patterns.
Example 4: Takeout-focused operation with phone and pickup volume
A takeout-driven restaurant often needs stronger order-source management than a dine-in-heavy concept. In this setup, one terminal handles walk-in orders while another manages phone orders and pickup questions. The system distinguishes order type clearly so staff can tell whether a ticket is walk-in, scheduled pickup, or delivery-related.
A label printer helps identify packaged orders, and the pickup area is physically separate from the order-taking space. Kitchen tickets include promised time or pickup timing notes where needed. Menu categories are built to support fast entry over the phone, which means the most commonly ordered items are easy to find and modifier logic is clean.
Payment setup allows both prepayment and payment on pickup. Receipts and labels help reduce handoff mistakes during busy periods.
Reports separate takeout sales from other channels, giving the operator better visibility into volume patterns and staffing needs. For many small restaurants, this kind of restaurant order management system setup is what prevents the front counter from becoming chaotic during peaks.
Restaurant POS setup checklist for small businesses
A restaurant tech setup checklist helps keep the process practical and organized. Use the list below from planning through launch.
- Define your service model: dine-in, counter-service, café, takeout, food truck, or hybrid
- Map each station and identify what tasks happen there
- Measure counter space, power access, and cable paths
- Confirm internet reliability and backup connectivity plan
- Choose terminals, printers, readers, drawers, handhelds, and any scanners
- Decide where kitchen printers or displays will be placed
- Build menu categories based on real service flow
- Configure item names, sizes, modifiers, combos, and add-ons
- Set required versus optional modifier rules
- Review tax settings for each relevant order type
- Configure tipping prompts and receipt preferences
- Set staff permissions by role
- Test manager approval flows for voids, refunds, and discounts
- Connect and test all payment devices
- Verify printer or kitchen display routing by prep station
- Run test orders for dine-in, takeout, split checks, cash, card, and refunds
- Review receipt formatting and ticket readability
- Train staff by role using realistic scenarios
- Conduct a soft launch or rehearsal service
- Gather first-week feedback and make targeted adjustments
- Review reports to confirm sales, discounts, and payments are categorized properly
Frequently Asked Questions
How long does restaurant POS setup usually take?
The timeline depends on the size of the menu, the number of stations, and how complex the service model is. A small café with one or two terminals may be much faster to configure than a full-service restaurant with table mapping, kitchen routing, split checks, and bar stations. The most important part is not just installation time but also planning, testing, and staff training.
What is the most important part of restaurant POS setup?
For most small businesses, menu and workflow configuration matter the most. Hardware is important, but daily service issues usually come from cluttered screens, confusing modifiers, poor printer routing, or weak payment flow. A strong setup makes order entry faster, improves kitchen accuracy, and gives managers better reporting.
Should a small restaurant use kitchen printers or a kitchen display system?
That depends on the kitchen layout, order volume, and staff preference. Kitchen printers are familiar and easy to use, while kitchen display systems can improve ticket visibility and organization. Some restaurants do best with a mix of both, using screens in one prep area and printed tickets in another.
How many POS stations does a small restaurant need?
The answer depends on service style, order volume, and where bottlenecks happen during peak hours. Some small restaurants can work well with one main station, while others need separate stations for the counter, bar, takeout, or server use. The right number is based on workflow, not just floor size.
How should staff permissions be set up in a restaurant POS?
Permissions should be assigned by role so employees can do their jobs without having access to sensitive functions they do not need. Cashiers, servers, bartenders, shift leads, and managers usually need different permission levels. Controls over refunds, voids, discounts, and price changes help maintain accountability and reduce errors.
What should be tested before launching a restaurant POS system?
Before going live, restaurants should test common and high-risk scenarios such as modifiers, combos, split checks, cash sales, card payments, contactless payments, refunds, kitchen ticket routing, receipt printing, and end-of-day closeout. It is also smart to test what happens if a printer disconnects or internet service becomes unstable.
How often should a restaurant adjust its POS after setup?
Most restaurants need a short adjustment period after launch. Changes should be based on real service patterns, such as repeated order errors, confusing modifier groups, or reporting issues. Once the core workflow is stable, it is better to make thoughtful improvements instead of constant changes that confuse staff.
Conclusion
A successful restaurant POS setup is not about having the most screens, the most features, or the most complicated configuration. It is about creating a system that supports the way your restaurant actually takes orders, communicates with the kitchen, accepts payment, trains staff, and reviews performance.
When the setup fits the operation, service feels smoother, mistakes become easier to prevent, and managers gain clearer visibility into what is happening every day.
For small businesses, that practical fit matters even more. Space is tighter. Teams are leaner. One weak station or one confusing workflow can affect the whole shift. A thoughtful setup helps protect speed, accuracy, accountability, and guest experience across both front-of-house and back-of-house operations.
If you are planning to set up a restaurant POS, start with the real workflow, not the hardware box. Map the service flow. Choose only the stations you need. Build menus the way staff think. Route tickets the way the kitchen works.
Set permissions carefully. Test heavily. Train by role. Then review, refine, and keep improving based on real service patterns. That is what turns a POS from a piece of equipment into a useful operating system for the restaurant.