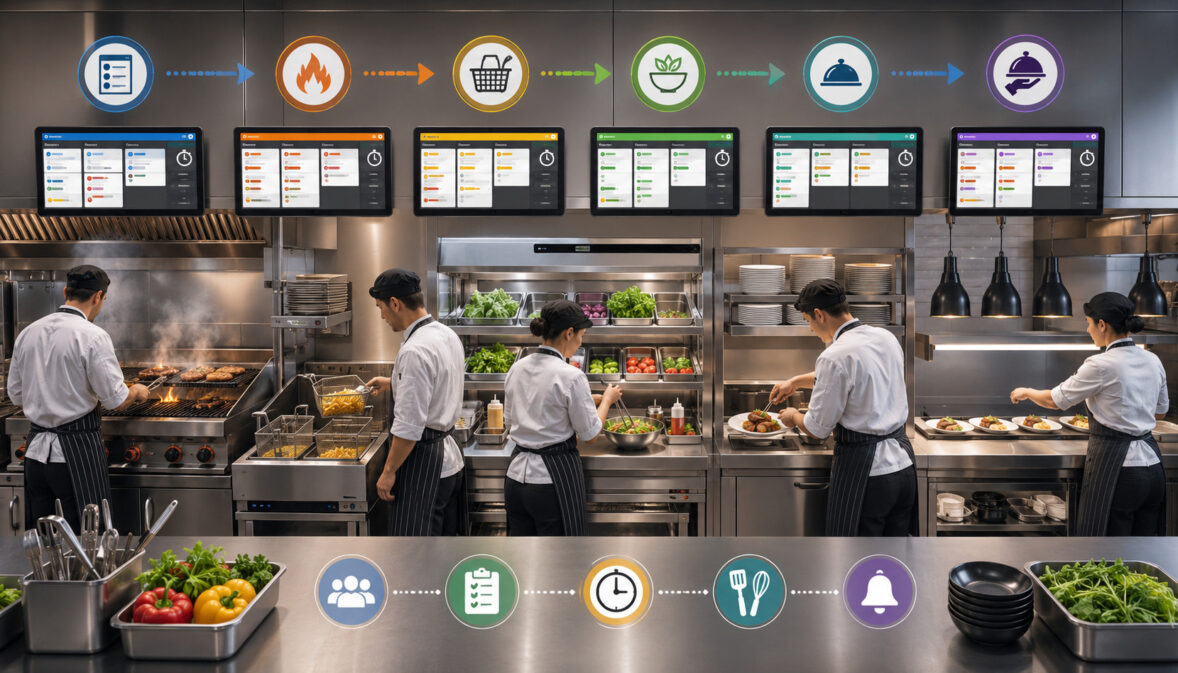
A kitchen display system can organize how orders move from the point-of-sale system to cooks, expediters, beverage teams, and packaging staff. However, installing screens alone does not create an efficient kitchen. The value comes from deciding what each station should see, when it should see it, and how completed items should move toward final handoff.
Learning how to Set Up Kitchen Stations in a KDS matters for almost every food-service format. A café may need separate coffee, pastry, and food queues. A full-service restaurant may need grill, fry, cold preparation, dessert, and expo stations. A quick-service kitchen may prioritize order numbers, combo assembly, drive-thru timing, and packaging.
The same principles also apply to ghost kitchens, bars, food trucks, delivery-focused concepts, and multi-location operations. Each business needs a kitchen display system setup that reflects its menu, physical layout, staff responsibilities, order volume, and service model.
When the setup is organized, line cooks receive relevant information without unnecessary ticket clutter. Expediters can see whether every part of an order is ready. Takeout employees can identify packaging instructions, and managers can recognize bottlenecks before a delayed station affects the entire service line.
A broader restaurant POS setup guide can help operators understand how menu design, order entry, kitchen routing, hardware, and staff training connect across the restaurant. The kitchen display system should be treated as part of that complete operational workflow, not as an isolated screen installation.
This KDS kitchen station setup guide for restaurants explains how to map the kitchen, create digital stations, configure KDS ticket routing, organize different order types, display modifiers, set timing rules, test the workflow, and train employees. The objective is a simple and dependable system built around how the kitchen actually prepares and hands off orders.
What Does It Mean to Set Up Kitchen Stations in a KDS?
Setting up kitchen stations in a KDS means creating digital destinations for incoming menu items and assigning each destination to a preparation responsibility. Instead of sending every order to one general kitchen screen, the system can divide the order among grill, fry, salad, pizza, beverage, dessert, bar, packaging, or other relevant stations.
For example, an order containing a burger, fries, salad, and milkshake may appear on several screens. The grill cook sees the burger and its temperature modifier. The fry cook sees the fries. Cold preparation sees the salad, while the beverage station sees the milkshake. An expo screen may show the complete order and the completion status of every item.
The setup process normally includes menu mapping, KDS station routing, ticket visibility, timing rules, screen controls, order-type labels, modifier formatting, and completion actions. It should also define what happens when an order is edited, voided, delayed, recalled, or transferred.
What a Kitchen Display System Does
A kitchen display system receives order information from a connected point-of-sale or ordering platform and presents it on digital screens. Depending on the configuration, orders may come from servers, counter terminals, kiosks, online ordering pages, delivery channels, drive-thru stations, or handheld devices.
Each ticket can display information such as the order number, table number, customer name, service type, menu items, modifiers, notes, elapsed time, pickup time, and current status. Staff may tap the screen or use a bump bar to mark items as started, ready, completed, or recalled.
Unlike a paper-only process, a KDS can maintain an active queue and update it when changes are made. Some configurations can also delay future orders, prioritize urgent tickets, group identical items, track station completion, or alert expo when an order is ready for assembly.
The technology does not determine the kitchen workflow by itself. Managers still need to decide how information should be separated and which actions employees should take at each stage.
Why Kitchen Station Setup Matters
Kitchen station setup affects what cooks see during the busiest parts of service. If irrelevant items fill a screen, employees may spend too much time scanning tickets. If routing rules are incomplete, items may be missed entirely or require repeated verbal reminders.
A logical restaurant KDS setup supports coordination between stations with different preparation times. A steak may require more time than a side salad, while fries may need to be prepared close to handoff. Appropriate timing and visibility help those items reach expo in the correct sequence.
Station setup also affects front-of-house communication. Servers need confidence that entered modifiers reach the responsible cook. Takeout employees need to know when packaging can begin. Expediters need a complete view of the order instead of checking several disconnected tickets.
The goal is not to eliminate communication. It is to make routine order information visible and consistent so verbal communication can focus on exceptions, urgent changes, and quality control.
Kitchen Display System Setup at a Glance
The following table provides a starting point for planning kitchen display system stations. It is not a fixed template. Restaurants should adapt the stations to their actual menu, layout, and employee responsibilities.
| KDS Station | Common Items Routed There | Why It Matters | Setup Tip |
| Grill station | Burgers, steaks, grilled chicken, proteins | Manages high-heat cooking and doneness | Display cook temperatures prominently |
| Fry station | Fries, wings, fried appetizers | Controls fast-moving items with short hold times | Use clear timers and concise modifiers |
| Salad station | Salads, cold appetizers, bowls | Keeps cold preparation organized | Group ingredients and dressing choices clearly |
| Pizza station | Pizzas, flatbreads, baked specialties | Supports a dedicated build-and-bake flow | Route by menu item and preparation style |
| Dessert station | Cakes, pastries, plated sweets | Prevents final-course items from being overlooked | Use course timing or held tickets |
| Beverage station | Coffee, smoothies, shakes, specialty drinks | Separates drink preparation from food production | Include sizes and customizations |
| Bar station | Cocktails, beer, wine, bar beverages | Keeps service-bar orders visible | Distinguish dining-room and bar-seat orders |
| Expo station | Complete order overview | Coordinates station completion and final handoff | Show all items and station statuses |
| Takeout station | Pickup, curbside, and delivery orders | Organizes packaging and off-premise flow | Display names, times, labels, and packaging notes |
| Prep station | Advance preparation and production tasks | Supports batch or scheduled preparation | Keep prep tickets separate from live service |
| Manager view | Order age, station status, bottlenecks | Supports oversight and adjustments | Focus on exceptions and delayed orders |
How to Use the Table
Begin by comparing the suggested stations with the physical preparation areas in the restaurant. Mark which areas have separate employees during peak service and which responsibilities are combined during slower periods.
A small café may combine food, pastry, and cold preparation on one KDS screen while keeping beverages separate. A larger operation may divide a single broad category into several digital stations because different cooks handle separate equipment or menu items.
Next, review whether each station needs an item-only view or a full-order view. Production cooks usually benefit from focused information. Expo, packaging, and management users often need broader visibility to understand how one station’s work fits into the complete order.
The table should become a planning document rather than a permanent rule. Add columns for screen location, employee role, order types, fallback printer, and required modifiers. This creates a station map that can be used during configuration, testing, and training.
Why Every Kitchen Needs a Custom Setup
The best way to organize kitchen stations in a KDS depends on how food is actually produced. A burger restaurant may rely heavily on coordinated grill and fry timing. A pizzeria may need separate dough preparation, topping, oven, cutting, and packaging responsibilities.
A café may route espresso beverages, brewed drinks, cold drinks, pastries, and heated food differently. A bar kitchen may need to distinguish orders from bar seats, dining tables, online channels, and service staff. A full-service operation may need course firing and seat information, while a quick-service restaurant may prioritize order numbers and speed.
Kitchen size also matters. Creating six digital stations in a kitchen staffed by two cooks may add unnecessary complexity. At the same time, routing everything to one display in a high-volume kitchen can overload employees and conceal bottlenecks.
A custom setup considers menu complexity, preparation responsibility, equipment placement, staffing patterns, order volume, service channels, and the role of expo. It starts with the operation, not with the maximum number of features available.
Steps One Through Four: Map the Workflow, Define Stations, Route Items, and Set Visibility
The first four steps establish the foundation of a KDS workflow setup. Restaurants should understand how orders move through the kitchen before creating screens or routing rules.
A useful workflow map begins where the order is entered and ends where it reaches the guest, pickup shelf, delivery driver, or service window. It should include every point where an item is prepared, checked, combined, packaged, or handed off.
Step One: Map the Real Kitchen Workflow
Follow several representative orders from entry to completion. Use at least one dine-in order, one takeout order, and one delivery order if those channels are offered.
Record where each item goes, who prepares it, what equipment is used, and who confirms completion. Include intermediate responsibilities such as warming bread, adding sauces, filling beverage cups, attaching labels, checking bags, or placing finished plates in a service window.
This exercise often reveals informal procedures that are not reflected in the menu categories. A side listed under “Entrées” may actually be prepared by the fry cook. A dessert may be plated by expo rather than a dessert station. A bottled beverage may be collected by the cashier instead of the kitchen.
The restaurant POS installation process provides useful context for mapping order entry, menu configuration, routing, hardware, testing, and staff responsibilities as one connected workflow.
Step Two: List Physical and Functional Stations
Create a list of all physical preparation areas, including grill, fry, cold preparation, pizza, sandwich, dessert, beverage, bar, expo, takeout, delivery, and advance prep. Then list functional responsibilities that may not have a dedicated physical space.
A functional station could be packaging, final garnish, quality control, drive-thru assembly, or manager oversight. These responsibilities may need a digital view even when they occur beside another station.
Do not assume every physical area needs its own KDS screen. One display may serve grill and sauté in a compact kitchen. Conversely, one physical counter may need separate digital queues for beverages and takeout packaging because employees manage those tasks independently.
Document peak and off-peak staffing as well. The system should remain understandable when stations are combined during a quiet period. Some platforms allow routing modes or screen views to change by service period, but even without that capability, the station structure should be manageable with fewer employees.
Step Three: Match Menu Items to Preparation Responsibility
Menu mapping determines where each item appears. Begin with broad categories, but verify every item individually. Burgers may route to grill, fries to fry, salads to cold preparation, coffee to beverage, and desserts to a dessert or expo station.
Routing should follow responsibility rather than the guest-facing menu design. A “Chicken Sandwich” may appear in the sandwich category at the register, but the chicken could be cooked at fry, assembled at sandwich, and checked at expo.
Combo meals require extra attention because their components may route to different stations. The main item, side, drink, sauce, and dessert should reach the employee responsible for each component without creating confusing duplicates.
Also review add-ons. Bacon, avocado, extra protein, premium sauces, and side substitutions may change which station needs to see the item. An accurate KDS configuration for restaurants accounts for those preparation responsibilities before live orders begin.
Step Four: Decide Which Tickets Each Station Should See
After mapping items, determine the visibility level for each display. An item-only screen shows employees the products they prepare. A full-order screen shows all items on the ticket, including products prepared elsewhere.
Item-only views reduce clutter and are generally useful for line stations. However, cooks may still need limited context, such as the order number, service type, course, quantity, and related timing information.
Expo usually needs a full-order view because the expediter coordinates all stations. A packaging station may also need the complete order, including drinks, sauces, utensils, and separately packaged items.
Duplicate routing should be intentional. Sending the same item to two screens can support handoffs, but it can also cause duplicate preparation if responsibilities are unclear. Every duplicated item should have a defined purpose, such as preparation on one screen and verification on another.
Steps Five Through Seven: Build Expo, Configure Routing, and Set Timing
Once the basic station structure is clear, the next stage is to coordinate the stations. This requires an expo view, detailed routing rules, and timing settings that reflect real preparation requirements.
These three elements work together. Routing sends an item to the responsible station, timing determines when it appears or becomes urgent, and expo confirms that the complete order is assembled correctly.
Step Five: Set Up the Expo Station
The expo station should provide a complete picture of each order. Its screen may show the table or order number, service type, all menu items, station progress, modifiers, elapsed time, course status, pickup time, and final completion state.
The expediter needs to know not only what has been completed but also what remains outstanding. A burger should not leave without its side, and a takeout bag should not be closed before drinks, sauces, and separately packaged items are confirmed.
For dine-in service, expo may coordinate plate timing and final presentation. For takeout and delivery, the role may include packaging, labels, utensils, and customer or driver handoff.
Avoid filling the expo screen with details that do not affect the handoff. The most useful KDS expo station setup emphasizes completeness, timing, important modifiers, service destination, and the status of each preparation area.
Step Six: Configure Station Routing Rules
KDS station routing may use menu categories, individual items, modifiers, order types, courses, or combinations of these rules. Category routing is efficient when every item within a category follows the same production path.
Item-level routing is better when items in one menu category are prepared differently. For example, most appetizers may go to fry, while one baked appetizer goes to the pizza oven. Individual rules prevent that exception from appearing at the wrong station.
Order-type routing separates dine-in, takeout, delivery, drive-thru, catering, or online tickets when their workflows differ. A dine-in dessert may be held for course firing, while a takeout dessert may need to appear immediately for packaging.
Create exception rules deliberately and document them. Complicated layers of category, item, modifier, and order-type conditions can become difficult to maintain. Use the simplest KDS order routing logic that consistently sends each responsibility to the correct employee.
Step Seven: Configure Timing and Priorities
Timing settings should reflect preparation time and the intended handoff. Items with longer cook times may need to appear earlier than items that are prepared quickly or have limited holding quality.
Use order timers to show how long a ticket has been active. If the system supports warning thresholds, set them according to realistic service targets rather than arbitrary numbers. A ticket should not appear late before the station has had enough time to prepare it normally.
Pickup and delivery orders may need delayed firing. Preparing an order immediately after it is placed can result in food waiting too long before the customer or driver arrives. Delaying it too much can create missed pickup windows.
Priority labels should be reserved for meaningful situations, such as a genuinely delayed order, an approved rush request, or a near-term pickup. When every ticket is marked urgent, employees lose the ability to distinguish actual priorities.
Steps Eight Through Ten: Separate Order Types, Format Modifiers, and Use Alerts
A KDS screen must communicate more than the menu item. Employees also need to understand where the order is going, what changes were requested, and whether the ticket requires special attention.
These details should be visible without making the screen difficult to scan. Consistency is more valuable than excessive decoration.
Step Eight: Organize Dine-In, Takeout, and Delivery Orders
Dine-in orders may need table numbers, seat positions, server identification, course information, and hold or fire instructions. These details help the kitchen understand both destination and pacing.
Takeout tickets may need the customer’s name, promised pickup time, curbside note, packaging instructions, and payment or handoff status where appropriate. Delivery orders may also need a delivery-channel label, driver pickup time, order identification, and packaging checks.
Use consistent service-type labels across all screens. Employees should not have to interpret several abbreviations for the same channel.
Restaurants with significant off-premise volume may benefit from a dedicated takeout station or separate screen section. This prevents packaging work from becoming hidden behind dine-in production while still allowing expo or managers to see the complete queue.
Step Nine: Configure Modifiers and Special Instructions
Modifiers should tell the responsible station exactly what changes the guest requested. Common examples include cooking temperature, side choice, dressing, sauce, toppings, substitutions, no or extra ingredients, and preparation notes.
Display modifiers directly beneath the related item and use consistent wording. “No onion,” “remove onion,” and “without onions” should not appear as three separate instructions if they mean the same thing.
Special instructions involving allergens require more than visual formatting. The KDS can communicate a request, but it does not replace ingredient review, cross-contact procedures, employee training, or professional food-safety guidance. Operators can consult federal food allergen information when developing their own procedures.
Use a clear process for acknowledging important notes. Do not assume that placing a note in a bright color is enough to manage a complex dietary or safety-related request.
Step Ten: Apply Color Coding and Alerts Carefully
Color coding can separate service types, show ticket age, identify held courses, or draw attention to delayed orders. For example, dine-in, takeout, and delivery tickets may use different headers while the ticket body remains consistent.
Limit colors to a small set of meanings. Employees should be able to explain what each color indicates without consulting a long guide. The same principle applies to sounds, flashing indicators, and pop-up alerts.
Too many signals create alert fatigue. Staff may begin ignoring warnings when normal tickets regularly trigger them. Use strong alerts for conditions that require action, not for routine events.
Test visual settings under actual kitchen lighting. A color that appears clear in an office may be difficult to distinguish through glare, steam, or distance. Text labels should support color so information remains understandable even when color differences are hard to see.
Steps Eleven Through Thirteen: Select Controls, Place Screens, and Plan Backups
KDS hardware has to work in a demanding physical environment. Employees may be wearing gloves, handling hot equipment, moving quickly, or standing several feet from the display.
Screen type, input method, placement, protection, and backup planning are therefore operational decisions rather than cosmetic choices.
Step Eleven: Choose Touchscreens or Bump Bars
Touchscreen displays allow employees to interact directly with tickets. They can be useful when the workflow includes item-level completion, scrolling, ticket recall, recipe views, or several status actions.
However, the screen must remain accessible when employees are wearing gloves or working with wet or greasy hands. The placement should not require reaching across hot pans, sharp tools, food-contact surfaces, or active equipment.
A bump bar provides physical buttons for selecting, advancing, recalling, or completing tickets. It can be effective in high-volume kitchens where employees need a small number of repeatable actions without touching the screen.
The right choice depends on station pace, screen distance, available space, cleaning procedures, and staff preference. Test both options with the employees who will use them during service rather than selecting solely from a product demonstration.
Step Twelve: Place Screens in the Right Locations
Cooks should be able to read tickets while remaining in their normal working position. A display mounted too far away, too high, or behind the employee may force repeated movement and distract attention from active cooking.
Consider viewing distance, text size, glare, mount angle, cable paths, and the direction employees face. The screen should not block shelves, ventilation, service windows, ingredient access, or communication between stations.
Protect hardware from heat, steam, grease, water, impact, and unstable mounting surfaces. Restaurant teams should also consider applicable workplace and electrical requirements when locating connected equipment. General restaurant workplace safety resources can provide a starting point, but site-specific questions should be reviewed by qualified professionals.
Step Thirteen: Establish a Backup Workflow
A backup process defines what staff will do if a display, local network, power source, or connected service becomes unavailable. The plan may include kitchen printers, handwritten tickets, verbal confirmation procedures, or moving orders to another screen.
Assign responsibility for recognizing the failure and activating the backup. Staff should know whether they continue entering orders in the point-of-sale system, move to a secondary terminal, or switch to a documented manual process.
Keep necessary supplies accessible. A backup printer is not useful if paper cannot be found, and a manual workflow will fail if employees do not know how to number or organize tickets.
Connected restaurant systems also raise network and data-protection considerations outside the scope of kitchen workflow design. Small-business cybersecurity guidance can support conversations with qualified technology professionals about access, updates, backups, and incident planning.
Steps Fourteen Through Sixteen: Test Routing, Train Employees, and Improve Expo Communication
A configuration that looks correct in an administrative screen may behave differently when real orders contain modifiers, combinations, edits, and multiple service types.
Testing and training should therefore use realistic restaurant scenarios. The objective is to reveal confusion before employees face live customers and peak volume.
Step Fourteen: Test Every Ticket Path
Build a test list that includes popular orders, complicated combinations, uncommon modifiers, course holds, substitutions, duplicate items, edited tickets, voided items, takeout orders, delivery orders, and future pickup times.
Send each test order from the same device or channel employees will use. An online order may behave differently from one entered at a server terminal, even when it contains identical items.
At every station, confirm that the correct items appear with readable quantities, modifiers, service labels, and timing information. Verify that expo receives the full order and that station completion updates are visible.
Test recalls and corrections as well. Employees need to know what happens when an item is bumped accidentally, changed after submission, or added to an existing order.
Step Fifteen: Train Kitchen and Front-of-House Teams
Kitchen training should cover ticket layout, order age, service-type labels, modifiers, item completion, full-ticket completion, recall functions, held items, and escalation procedures.
Front-of-house employees also need KDS training because order entry controls the quality of kitchen information. Servers and cashiers should understand required modifiers, special-instruction fields, course buttons, order types, and the effect of sending or holding an item.
Train with scenarios rather than feature lists. Ask one employee to enter a complicated order while cooks prepare from the resulting displays. Then review whether the information was clear and whether anyone relied on an avoidable verbal explanation.
Document common actions for new hires. A one-page station guide can show screen meanings, bump procedures, recall steps, and what to do when information appears incorrect.
Step Sixteen: Use Status Updates to Support Expo
Station completion status allows expo to see which parts of an order are ready. This can reduce repeated questions between the expediter and individual cooks, especially when the line is noisy or stations are physically separated.
Define what “complete” means at every station. At grill, it may mean the protein is cooked and transferred for assembly. At fry, it may mean the item is placed in the service window. At beverage, it may mean the drink has been labeled and moved to the pickup area.
Consistency matters because premature completion can mislead expo, while delayed completion makes ready orders appear unfinished. Employees should update status at the same point in the workflow every time.
A full-order expo view can also prevent missing sides, sauces, desserts, and drinks. The expediter should still perform a physical quality and completeness check rather than relying solely on digital status.
Steps Seventeen Through Twenty: Adapt the KDS to Different Service Models
Not every restaurant needs the same pacing or station structure. Course-based dining, quick service, beverage-led concepts, and delivery-focused operations place different demands on KDS configuration.
The following adaptations show how the same routing principles can support several common service models.
Step Seventeen: Configure Course Firing
Course firing allows appetizers, entrées, and desserts to reach the kitchen at appropriate times rather than appearing as one immediate production queue.
Decide who controls the fire action. It may be the server, expediter, kitchen manager, or a timing rule. Responsibilities should be clear so courses are not fired twice or left on hold.
Each station needs to recognize held, fired, and completed items. Expo should see the status of the entire table and monitor whether one course is approaching completion before the next begins.
Course timing is affected by guest pace, communication, and actual cook times. The KDS can support pacing, but employees still need a process for unusual delays, guest requests, and changes made after the original order.
Step Eighteen: Configure Quick-Service Workflows
Quick-service KDS screens should prioritize readability, speed, order numbers, combo components, packaging, and service destination. Avoid showing information that does not help the station prepare or assemble the order.
Separate production from assembly where volume requires it. Grill and fry cooks may use item-focused views, while an assembly screen shows the complete order, packaging notes, and missing components.
Drive-thru, counter pickup, dine-in, and mobile orders should be distinguishable without creating four entirely different workflows unless necessary. Consistent order numbers and destination labels help employees match prepared food to the correct customer.
Use order throttling or delayed firing carefully when available. These tools should balance station capacity without hiding demand or causing promised pickup times to be missed.
Step Nineteen: Configure Bars and Cafés
Bars and cafés often require beverage station routing that is independent of kitchen food routing. Espresso drinks, brewed coffee, smoothies, cocktails, beer, wine, pastries, and heated food may each involve different employees.
Beverage tickets should show size, temperature, milk choice, syrup, spirit, garnish, or other relevant modifiers in a predictable order. Avoid sending food modifiers to a beverage display when they do not affect beverage preparation.
Coordination is especially important when food and drinks have very different preparation times. A drink made too early may lose quality, while a drink made too late delays the complete order.
Use pickup names, table identifiers, or order numbers consistently across both food and beverage stations. Expo or the handoff employee should be able to confirm that all components belong to the same order.
Step Twenty: Configure Online Ordering and Delivery
Online orders should enter the same controlled menu and routing structure as employee-entered orders whenever possible. Duplicate item names, inconsistent modifiers, or disconnected menus can produce confusing kitchen output.
Configure firing around promised pickup and delivery windows rather than automatically sending every future order to production immediately. Consider preparation time, packaging time, expected driver arrival, station capacity, and current kitchen volume.
Display customer names, order identifiers, pickup times, service labels, packaging notes, and relevant special instructions. Keep long customer-facing comments from overwhelming production screens by routing only necessary information to each station.
Packaging checks should include drinks, sauces, utensils when requested, labels, sides, desserts, and items stored separately because of temperature. A dedicated takeout screen can help employees complete these checks without disrupting dine-in expo.
Common KDS Kitchen Station Setup Mistakes
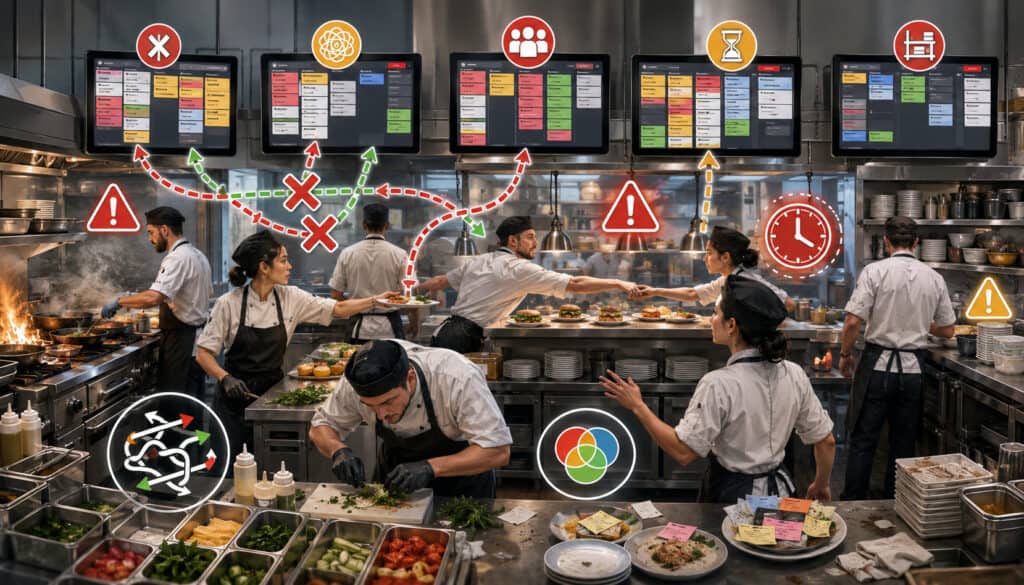
Most KDS problems come from a mismatch between the configuration and the real kitchen workflow. A technically functional system can still create delays if station responsibilities are unclear or screens show too much information.
Common restaurant KDS setup mistakes include:
- Routing most of the menu to one overloaded display.
- Creating more digital stations than the team can manage.
- Building rules around menu categories instead of preparation responsibility.
- Hiding modifiers in small or inconsistent text.
- Sending duplicate items without defining who prepares them.
- Failing to separate service types when their handoff processes differ.
- Placing screens where they are difficult to see or reach.
- Skipping realistic order testing.
- Training only managers instead of daily users.
- Leaving old routing rules in place after menu changes.
- Using too many colors, sounds, and urgency indicators.
- Failing to define a backup procedure.
Overloading One Station
A screen can become overloaded when too many categories, order types, or duplicated items are routed to the same queue. Employees then spend more time sorting information mentally, and genuinely delayed tickets can become difficult to identify.
Review both ticket count and preparation workload. Ten bottled beverages do not create the same demand as ten cooked entrées. Station capacity should be evaluated according to the actual tasks represented by the tickets.
If a station is consistently overloaded, the solution may involve routing changes, staffing, menu simplification, equipment, order timing, or physical layout. Adding another screen without changing responsibility may simply divide the same confusion across two displays.
Monitor the station during peak periods. Look for repeated ticket scanning, verbal reordering, missed modifiers, long queues, and items that are completed much earlier or later than the rest of the order.
Failing to Update Routing After Menu Changes
New menu items do not always inherit the correct station rules. Seasonal specials, revised recipes, new sides, limited-time beverages, and changed preparation methods should be reviewed before they become available for ordering.
Create a routing check as part of the menu-change process. Confirm the item name, category, modifiers, preparation station, expo visibility, printer fallback, course behavior, and service-type rules.
Also update routing when employee responsibilities change. A dessert previously prepared by expo may move to a dedicated pastry station. A café may move bottled drinks from the beverage team to the cashier.
Remove obsolete rules instead of continually adding exceptions. A clean routing structure is easier to troubleshoot and reduces the risk that an old setting will affect a new item unexpectedly.
KDS Kitchen Station Setup Checklist
Use the following checklist before launch, after significant menu changes, and whenever kitchen responsibilities are reorganized.
| Checklist Area | What to Review | Why It Matters | Priority |
| Kitchen layout | Physical stations, equipment, staff movement, handoff points | Supports logical routing and screen placement | High |
| Menu mapping | Items, categories, add-ons, combos, and station responsibility | Reduces missing or misrouted items | High |
| Expo setup | Complete-order view and station completion status | Coordinates final handoff | High |
| Order types | Dine-in, takeout, delivery, drive-thru, catering | Keeps service flows identifiable | High |
| Modifiers | Temperatures, substitutions, allergies, notes, side choices | Improves ticket clarity | High |
| Timing | Cook times, fire times, pickup times, warning thresholds | Supports coordinated pacing | High |
| Screen placement | Visibility, reach, heat, steam, grease, cables, mounting | Helps employees use equipment consistently | High |
| Controls | Touchscreen actions, bump bar functions, recall procedures | Reduces accidental or inconsistent actions | Medium/High |
| Backup plan | Printer fallback or documented manual workflow | Supports continuity during disruptions | Medium/High |
| Testing | Normal, complex, edited, voided, and channel-specific orders | Finds configuration problems | High |
| Training | Kitchen, expo, front-of-house, takeout, and management roles | Builds consistent use | High |
| Ongoing review | Ticket times, bottlenecks, staff feedback, menu changes | Keeps the setup aligned with operations | High |
How to Use the Checklist
Assign an owner to each checklist area. The kitchen manager may review workflow and station responsibilities, while another manager coordinates menu configuration, training, and test orders.
Do not mark an item complete merely because a setting exists. Confirm that it works through a real test. For example, menu mapping is not complete until an employee enters the item and the responsible cook sees the correct ticket.
Review the checklist during a simulated rush. Send several orders close together, including different service types and difficult modifiers. Observe whether screens remain readable and whether employees know what action to take.
Repeat the review after launch. Real service may reveal that a screen is difficult to reach, a timer threshold is unrealistic, or one station receives information it does not need.
Records to Keep for KDS Setup
Maintain a current station map that lists each screen, its physical location, the employee role using it, and the menu items or categories routed there. Keep a separate record of important item-level exceptions.
Save modifier lists, service-type rules, course settings, timing thresholds, test results, training notes, and backup procedures. These records make it easier to investigate problems and train new managers.
Keep support and escalation information accessible, but do not place sensitive passwords or unrestricted administrative credentials in a public station guide.
Date operational reviews even when the article or station documents do not use a date in their title. Internal records should show when routing was last tested and who approved a change so teams can identify outdated instructions.
Best Practices for Organizing Kitchen Stations in a KDS
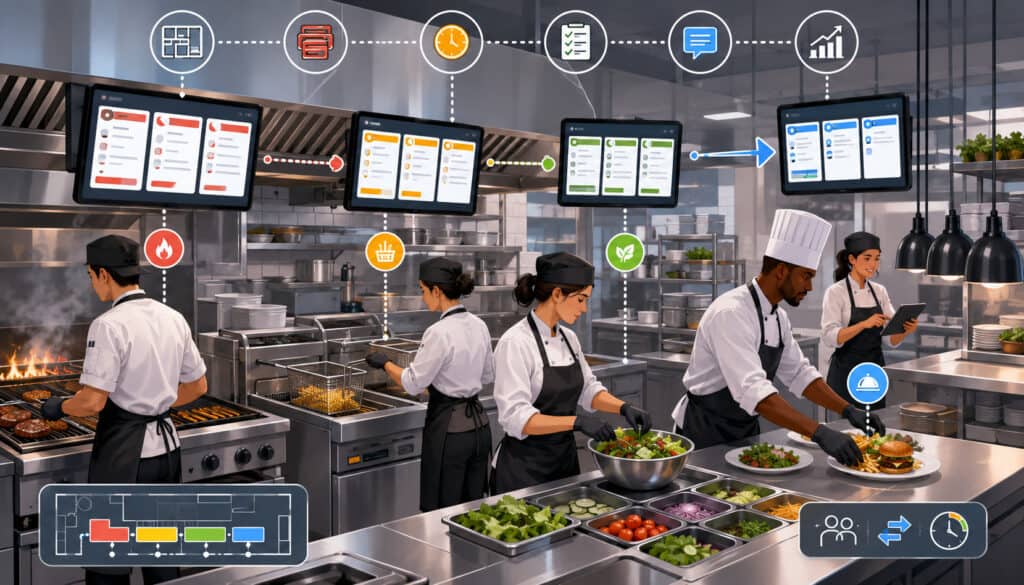
An effective kitchen display system workflow is usually easier to understand than an ineffective one. Each station has a defined purpose, each item follows a predictable route, and employees use consistent status actions.
Apply these practices:
- Map the actual workflow before configuring screens.
- Keep the number of stations manageable.
- Route items according to preparation responsibility.
- Give production stations focused ticket views.
- Give expo a complete-order view.
- Make modifiers consistent and easy to scan.
- Separate service types where their workflows differ.
- Reserve strong alerts for meaningful exceptions.
- Place screens where employees can read them naturally.
- Test complicated orders, not only basic transactions.
- Train kitchen and front-of-house employees together.
- Review ticket times after launch.
- Update routing whenever menus or responsibilities change.
- Maintain a documented backup workflow.
- Use qualified professional guidance for matters outside operational configuration.
Create a Simple KDS Station Map
Draw the kitchen layout and mark every screen, printer, preparation area, service window, and packaging location. Use arrows to show how items and completed orders move.
Beside each station, list the item categories it prepares and the service types it receives. Note any responsibilities shared with another station and identify who updates the completion status.
The map can also show screen controls and fallback devices. For example, the fry station may use a bump bar and fall back to a kitchen printer, while takeout may use a touchscreen and move to the expo display if its screen fails.
Keep the map simple enough for training. A complex technical diagram may help support personnel, but daily employees need a clear operational reference that reflects the tasks they perform.
Review Operational and Professional Responsibilities Separately
KDS configuration can improve ticket presentation, but it does not determine legal compliance, food-safety procedures, employment practices, payment security, taxes, accounting treatment, or financial controls.
Restaurant operators should seek appropriately qualified review for those subjects. For example, connected POS and payment environments may require specialized cybersecurity and payment-security evaluation.
General payment data security resources for merchants can help teams identify questions to discuss with their payment, technology, and security professionals.
Likewise, screen placement does not replace an assessment of workplace, electrical, fire, sanitation, or equipment requirements. Operational convenience should be considered alongside applicable professional guidance.
Keeping these responsibilities separate prevents the KDS from being treated as a substitute for policies, training, or expert review that must extend beyond ticket routing.
How to Improve KDS Workflow After Launch
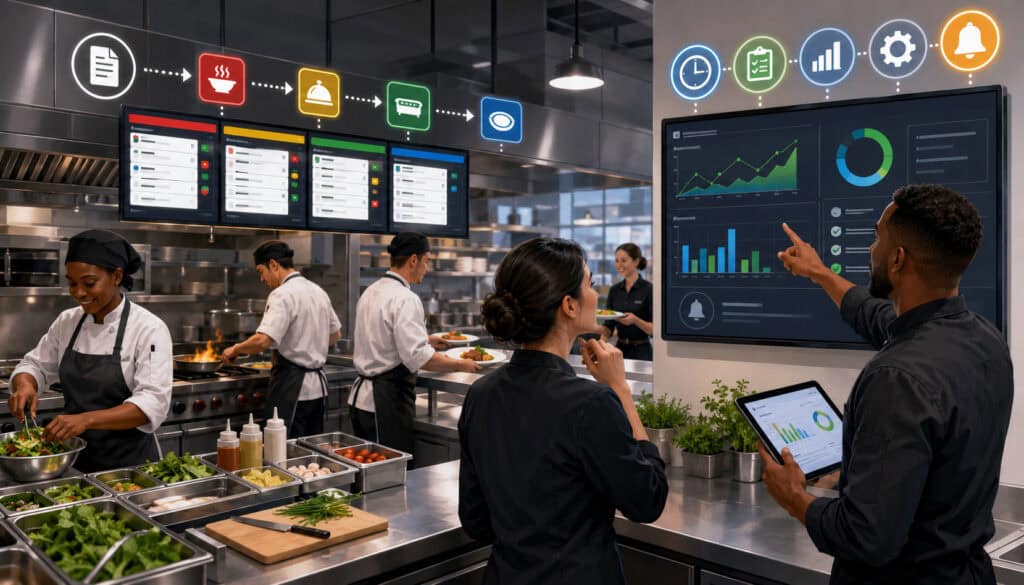
The first live configuration should be treated as a controlled starting point. Employees will discover issues that were difficult to reproduce during testing, particularly when several ordering channels become busy at the same time.
Make adjustments based on observed patterns rather than isolated complaints. A single unusual order may not justify a routing change, but repeated confusion around the same item or station deserves attention.
Watch Ticket Times and Bottlenecks
Review which stations regularly hold orders and which items frequently finish too early. Compare the digital timer with what employees actually experience during preparation.
A high ticket time does not always mean a cook is working slowly. The station may be receiving too many responsibilities, waiting for shared equipment, handling unclear modifiers, or preparing items before another station is ready.
Look at the complete workflow. If fry finishes consistently while grill remains delayed, firing rules may need adjustment. If expo waits for drinks, beverage routing or completion status may be unclear.
Operational data can also help teams recognize menu-related patterns. Guidance on using POS data to review menu performance can complement direct kitchen observations when deciding whether item complexity or sales mix is contributing to station pressure.
Gather Staff Feedback
Ask cooks which tickets require repeated interpretation, which modifiers are difficult to notice, and which status actions feel unnatural. Expediters can identify missing context and recurring incomplete orders.
Servers and cashiers can explain where order-entry choices create kitchen confusion. Takeout employees may reveal that packaging notes appear too late or on the wrong screen. Managers can identify recurring overrides and support requests.
Request specific examples instead of broad opinions. “The system is confusing” is difficult to act on. “The side substitution appears only at grill and not at fry” points to a routing problem that can be tested.
After making a change, explain it to affected employees and observe the next service. Undocumented adjustments can create more confusion than the original problem.
How to Choose KDS Settings for Your Restaurant
The final KDS screen setup should reflect the size and complexity of the operation. A smaller restaurant may perform well with one production screen and one expo view. A large kitchen may need several specialized stations and a manager overview.
Consider the number of active cooks, menu complexity, peak ticket volume, cook-time variation, takeout and delivery share, course requirements, physical distances, screen visibility, and available backup options.
A restaurant POS selection guide can help teams evaluate whether kitchen routing, KDS support, online ordering, hardware, and service-model features fit the broader operation.
Questions to Ask Before Finalizing the Setup
Use these questions during setup review:
- Which physical preparation areas need independent queues?
- Who is responsible for every menu item and component?
- Which stations need item-only views?
- Which roles need the complete order?
- Where should modifiers and special notes appear?
- How will combos and shared items route?
- How will dine-in, takeout, delivery, and future orders differ?
- Who controls course firing?
- What do timer colors and alerts mean?
- When should employees mark an item complete?
- Can every display be read from the normal work position?
- What happens if a screen or connection fails?
- Has every ordering channel been tested?
- How will routing be updated after menu changes?
- Who owns ongoing KDS documentation and training?
Record the answers. If employees give different answers to the same responsibility question, the workflow needs clarification before launch.
Choose Workflow Fit Over Complexity
The most advanced KDS configuration is not automatically the best one. Additional stations, routing conditions, colors, timers, and status actions are useful only when they solve an operational need.
Start with the smallest structure that clearly represents the kitchen. Add complexity when observations show that a station needs more focused information or a service channel requires different timing.
Avoid building around features that employees will not use consistently. A simple bump-and-recall process may outperform a multi-stage status workflow if the team cannot update every stage during peak service.
The best kitchen order display system setup helps employees understand what to prepare, when to prepare it, and where it goes next. It should reduce interpretation rather than create another layer of work.
Frequently Asked Questions
What does it mean to set up kitchen stations in a KDS?
It means creating digital preparation destinations and deciding which menu items, modifiers, and order types appear at each destination.
The setup may include grill, fry, cold preparation, beverage, dessert, expo, packaging, or other stations. Each station should receive the information its employees need while avoiding unrelated ticket clutter.
The process also includes timing, status actions, screen placement, order-type labels, testing, training, and backup procedures. A successful setup mirrors the restaurant’s actual preparation and handoff workflow.
What stations should a restaurant include in a KDS?
Common stations include grill, fry, salad, pizza, sandwich, dessert, beverage, bar, expo, takeout, delivery, and prep. A manager view may also be useful for monitoring order age and station workload.
Not every restaurant needs all of these stations. The correct number depends on menu complexity, kitchen layout, staffing, equipment, and order volume.
Create a separate station when a responsibility requires its own queue or status. Avoid creating a new digital station merely because the software allows it.
How does KDS station routing work?
Routing rules connect menu items or order information to designated KDS screens. A rule may be based on category, individual item, modifier, course, service type, or ordering channel.
For example, burgers may route to grill, fries to fry, drinks to beverage, and the complete order to expo. A takeout version of the same order may also appear at packaging.
The rules should be tested with actual orders because combinations, substitutions, and channel-specific menus can create exceptions that are not visible during basic configuration.
What is the best way to organize kitchen stations in a KDS?
Begin with a map of the real kitchen workflow. Identify who prepares every item, which stations share responsibilities, and where the final order is checked or packaged.
Keep production screens focused, give expo complete-order visibility, and use consistent modifiers and service labels. Configure timing around actual cook and pickup requirements.
The best organization is the one employees can follow consistently during a rush. It should fit the kitchen rather than copy another restaurant’s station layout.
Should every kitchen station have its own KDS screen?
No. A small kitchen may use one screen for several preparation responsibilities, especially when the same cook handles them.
A dedicated screen becomes useful when a station has a separate employee, distinct equipment, significant ticket volume, or a queue that needs to be managed independently.
Too many displays can fragment communication. Too few can overload one queue. The decision should be based on responsibility and workload rather than the physical number of counters or appliances.
How do restaurants set up an expo station in a KDS?
Configure expo to see the complete order, including items routed to other preparation stations. Display order identification, service type, important modifiers, timers, and station completion status.
Define what each station’s completion action means. Expo should be able to tell whether an item is still being prepared, ready for assembly, or fully handed off.
For off-premise orders, the expo or takeout view should also support packaging checks, customer identification, pickup timing, and separately handled items.
What mistakes should restaurants avoid during kitchen display system setup?
Avoid routing everything to one screen, creating unnecessary stations, hiding modifiers, using inconsistent labels, placing displays poorly, and launching without realistic testing.
Restaurants should also avoid sending duplicate items to multiple stations without defining responsibility. This can cause the same item to be prepared twice.
Other mistakes include unrealistic timer thresholds, excessive alerts, weak employee training, missing backup procedures, and failing to update routing when menu items or preparation responsibilities change.
Conclusion
Learning how to Set Up Kitchen Stations in a KDS begins with understanding the kitchen rather than configuring technology. Restaurants should trace orders from entry to handoff, identify real preparation responsibilities, and create only the digital stations necessary to support that workflow.
Menu items should route according to who prepares them. Production screens should stay focused, while expo receives enough visibility to coordinate complete orders. Modifiers, service types, order timers, pickup times, and completion statuses should use consistent formats that employees can understand quickly.
Testing is essential. Restaurants should test dine-in, takeout, delivery, online, modified, edited, voided, delayed, and coursed orders before launch. Kitchen, expo, front-of-house, beverage, and takeout employees should participate because each group affects the information that moves through the system.
After launch, managers should watch ticket timing, station workload, missing components, confusing modifiers, screen placement, and employee feedback. Routing should be updated whenever the menu, kitchen layout, service model, or preparation responsibility changes.
The best kitchen display system setup is not the one with the most screens or rules. It is the one that gives every employee the right information at the right point in the workflow, helping the kitchen prepare accurate orders, coordinate stations, organize off-premise service, and maintain a steady flow from order entry to final handoff.